Tevo Tarantula MKS Gen L Setup Guide
Setting up your Tevo Tarantula MKS Gen L 3D printer can seem daunting at first, but with this comprehensive guide, you’ll be printing in no time. This guide will walk you through the entire setup process, from unboxing to your first successful print. Follow these steps closely to ensure a smooth and enjoyable 3D printing experience. Remember to take your time, and don’t hesitate to revisit sections as needed. This guide is designed to help both beginners and those with some experience get their Tevo Tarantula up and running efficiently.
Unboxing Your Tevo Tarantula
The first step is, of course, unboxing. Carefully remove all the components from the box. It’s important to handle each part with care to prevent any damage during the initial setup. Lay everything out on a clean surface. This organized approach will allow you to quickly identify each piece. At this stage, also, make sure you have enough space on your desk or table. Proper lighting is also essential as you will need to distinguish the components from each other. Place all the parts neatly next to each other to prepare for the next step.
Checking the Parts List

Once everything is unboxed, cross-reference the contents with the parts list provided in the user manual. Ensure all components are present. This includes the frame, the MKS Gen L board, stepper motors, endstops, thermistors, hotend, heatbed, power supply, and various screws, nuts, and connectors. If you find any missing parts, contact the retailer or manufacturer immediately. It’s also important to check for any signs of damage during shipping, which may require a claim with the shipping carrier or the seller. Verify everything is in the correct order to prevent any further issues in the setup process.
Preparing Your Workspace
Before you start assembling the printer, it’s important to prepare your workspace. Choose a well-lit, spacious area where you have plenty of room to work. A clean surface is crucial for preventing parts from getting lost or damaged. Make sure you have access to a power outlet. Consider using an anti-static mat to protect sensitive electronic components from electrostatic discharge. Having a dedicated workspace will make the assembly and setup process much easier and more organized. Make sure that you are comfortable in this area.
Tools You’ll Need
Gather the necessary tools before you begin. You will typically need a set of Allen wrenches (hex keys), a Phillips head screwdriver, wire cutters, and a multimeter (for checking voltages). A pair of pliers can also be useful for handling small parts and wires. A soldering iron may be required if you plan to customize or upgrade any components. It’s also good to have some zip ties for cable management and organization. Having all the right tools at hand will streamline the assembly process and reduce the chances of frustration. This will make the entire process much smoother.
Firmware Flashing

Flashing the firmware is a critical step for your printer to function correctly. The MKS Gen L board requires firmware to control the printer’s movements, temperature, and other functions. Before beginning, it’s best to check which version is already installed on your printer. The stock firmware may not be the most up-to-date. You can choose between Marlin or other custom firmwares. This process ensures that your printer has the latest features and bug fixes.
Downloading and Installing Firmware
You’ll need to download the firmware from the internet. You can usually find pre-compiled versions online. Connect your MKS Gen L board to your computer via USB. Download the firmware file and open the Arduino IDE. Select the correct board and port in the Arduino IDE. Upload the firmware to the board. The process typically takes only a few minutes. After successful installation, the printer is ready for the next steps. Verify the installation by checking the printer’s display and movement after a successful upload. Ensure that all functions are working correctly.
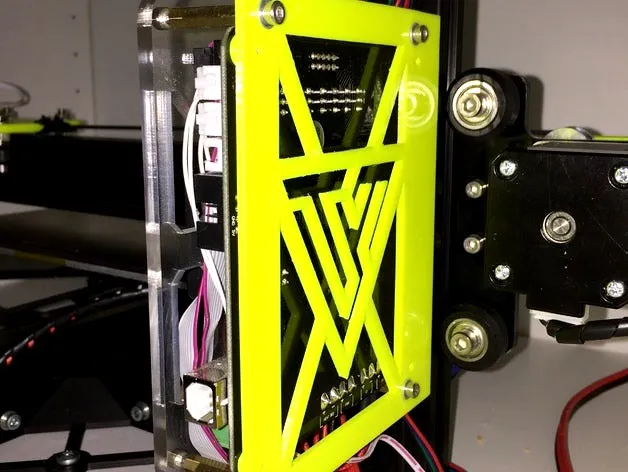
Connecting the MKS Gen L Board
The MKS Gen L board is the brain of your Tevo Tarantula. Proper wiring is essential for functionality. First, mount the board securely to the printer frame. Ensure the board is positioned correctly to avoid short circuits. The MKS Gen L board typically comes with various connectors and pins for different components. Following the wiring diagrams in the user manual will prevent errors. Before connecting the wires, double-check the polarity and ensure all the connections are firm. Incorrect wiring may damage the board or other components.
Wiring the Stepper Motors

Connect the stepper motors to the corresponding drivers on the MKS Gen L board. The stepper motors are responsible for moving the X, Y, and Z axes, as well as the extruder. These motors have specific connectors that must be plugged into the correct slots. Make sure the wiring matches the motor directions. If the motor moves in the wrong direction, you may need to reverse the wiring. This ensures the printer moves accurately. Proper motor wiring is crucial for the printer’s precision and print quality. Take extra time on this step for best results.
Connecting Endstops and Thermistors
Connect the endstops to the appropriate pins on the MKS Gen L board. The endstops are small switches that tell the printer when it reaches the end of its travel range. The thermistors are used to measure the temperature of the hotend and the heatbed. These components are vital for preventing crashes and ensuring safe printing. Connect the thermistors carefully to the correct terminals. Make sure the connections are secure. Confirm that the endstops trigger correctly. Proper wiring of these components is critical to avoid collisions and to regulate temperature.
Wiring the Hotend and Heatbed
Connect the hotend and heatbed to the appropriate terminals on the MKS Gen L board. The hotend heats up to melt the filament, and the heatbed provides a surface for the first layer of the print to adhere to. Use the correct wiring gauge to connect the hotend and heatbed, as these components draw a significant amount of power. Ensure the connections are secure to prevent overheating and potential fire hazards. Test the heating functionality of both the hotend and heatbed after connection. Always prioritize safety to avoid short circuits and accidents.
Configuring the Power Supply

The power supply provides the necessary power to run your 3D printer. Double-check the voltage settings on the power supply. Ensure that it matches the voltage requirements of your printer and your local power grid. Connect the power supply to the MKS Gen L board. Make sure the positive and negative terminals are connected correctly. It is crucial to make sure everything is connected properly to avoid serious issues. Check for loose wires and exposed terminals. If you are unfamiliar with electrical components, seek help. Before powering on, it’s best to do a thorough check of all the connections.
Powering Up and Initial Testing
Once all the components are wired, it’s time to power up the printer. Turn on the power supply and check the printer’s display. The display should show the firmware’s startup screen. If there’s no response, double-check all the connections. Check the power supply, fuses, and the wiring of the power supply. Test the functionality of all the axes by manually moving them. Ensure that all motors are moving in the correct direction. Make sure that the endstops are functioning correctly. Proper testing will help you identify any wiring problems or mechanical issues before your first print.
Leveling the Bed
Leveling the bed is the most critical step for achieving successful prints. An uneven bed can cause prints to fail to stick to the print surface. Most Tevo Tarantula printers have manual bed leveling. Adjust the bed leveling screws at each corner of the bed until the nozzle is at the right distance from the bed. You can use a piece of paper or a feeler gauge to measure the distance. As you go, you will feel the resistance. Ensure that the nozzle is moving smoothly across the bed without scraping or being too far away. Leveling the bed properly is a crucial step to be able to print successfully.
Adjusting the Z-Offset

After bed leveling, you’ll need to adjust the Z-offset. The Z-offset defines the distance between the nozzle and the bed when the printer homes on the Z-axis. This setting ensures the first layer of your print adheres properly. You can adjust the Z-offset through the printer’s control panel or by modifying the firmware settings. Adjust the Z-offset in small increments until the first layer sticks perfectly. The ideal Z-offset is crucial for good adhesion and print quality. The adjustment can make or break the print.
Loading Filament
Loading the filament is the next step. The Tevo Tarantula usually takes 1.75mm filament. Insert the filament into the extruder. Preheat the hotend to the recommended temperature for your filament type. Use the printer’s control panel to feed the filament through the hotend nozzle. Wait for the filament to extrude consistently. Make sure there are no obstructions in the hotend. Clean the nozzle if needed. Check for the correct temperature of the hotend. If you find that the filament is not coming out, you may need to adjust the temperature and/or clear any potential clogs.
First Print Test
With the printer set up and filament loaded, it’s time for your first print. Choose a test print file. It is a good idea to start with a small, simple object like a calibration cube. Slice the model using slicing software. Save the G-code file onto an SD card. Insert the SD card into your printer, and start the print from the printer’s control panel. Monitor the print closely during the first layer. Observe whether the filament is adhering to the bed. If there are issues, adjust the bed leveling and Z-offset. If you have problems, you may need to go back to the previous settings.
Troubleshooting Common Issues
You might encounter some issues during setup. Common problems include nozzle clogging, bed adhesion problems, and motor direction issues. Learn how to unclog the nozzle. Use a needle or the appropriate tool. If the prints don’t stick to the bed, adjust the bed leveling, Z-offset, and bed temperature. If the motors are moving in the wrong direction, reverse the wiring. These are just a few common issues. Refer to the printer’s manual or online resources for more comprehensive troubleshooting tips. Patience and persistence are critical during the troubleshooting process.
Calibration and Optimization
Once you have completed the initial setup, calibration, and optimization are essential for improving print quality and performance. Calibrating the E-steps, PID tuning the hotend, and adjusting the print speed and temperature will help you achieve better results. As you experiment with different settings, keep a log of your changes and the results you get. Fine-tuning your printer takes time and effort. By calibrating and optimizing the printer, you will get the most out of your Tevo Tarantula MKS Gen L 3D printer. Use the software and the available tools to optimize every aspect of your prints. This will help get you the best results.