Understanding the Tevo Tarantula i3 3D Printer
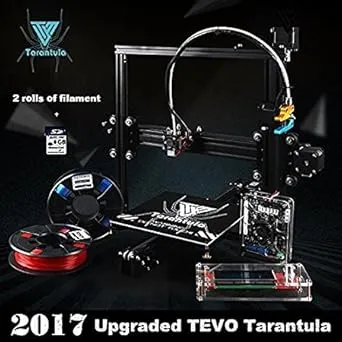
The Tevo Tarantula i3 is a popular and affordable 3D printer, ideal for hobbyists and beginners venturing into the world of additive manufacturing. Based on the Prusa i3 design, it offers a decent build volume, making it suitable for various projects. Its open-source nature allows for easy customization and upgrades, contributing to its popularity within the 3D printing community. This guide will help you set up your Tevo Tarantula i3 3D printer, understand its components, and achieve successful prints. Understanding the basics of your printer will significantly impact your printing experience and future upgrades. This printer is a great choice for learning 3D printing.
Key Components of the Tevo Tarantula i3 3D Printer
The Tevo Tarantula i3 3D printer comprises several key components, each playing a crucial role in the printing process. Familiarizing yourself with these parts is essential for understanding how the printer operates, troubleshooting issues, and performing maintenance. Proper understanding of each component allows for a better printing quality and helps in quick and efficient repair, should problems arise during the printing process. These components include the frame and structure, the hotend and extruder, the heated bed, and the control board and electronics. You will be able to assemble the printer much more easily if you understand each component.
The Frame and Structure
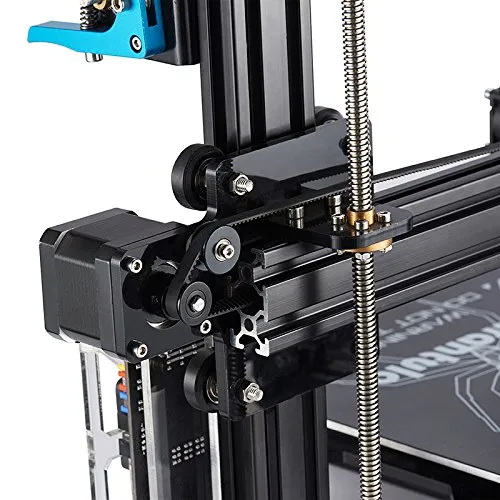
The frame provides the structural support for the entire printer. Typically constructed from aluminum extrusions, it ensures stability and rigidity during operation. The frame houses the X, Y, and Z-axis movement systems, allowing the print head to move precisely in three dimensions. A stable frame is crucial for print quality. Ensure all screws are tightened properly during assembly to maintain frame integrity. A well-built frame minimizes vibrations and ensures accurate layer deposition, leading to higher-quality prints. Check the frame regularly for any loose screws or signs of wear and tear. A sturdy frame is the foundation of your 3D printer’s success.
The Hotend and Extruder
The hotend is responsible for melting the filament and extruding it onto the print bed. It consists of a heating element, a nozzle, and a heat sink. The extruder feeds the filament into the hotend. Ensure the hotend temperature is correct for the chosen filament. A properly functioning hotend is critical for achieving consistent extrusion and layer adhesion. The extruder pushes the filament through the hotend, and issues here often lead to under-extrusion or over-extrusion. The hotend and extruder must work in sync to create successful prints. Regular maintenance, including cleaning the nozzle and checking the extruder gear, is essential. A malfunctioning hotend will lead to print failure.
The Heated Bed
The heated bed provides a stable and consistent surface for the initial layers of your print to adhere. It is crucial for preventing warping and ensuring good bed adhesion, particularly with materials like ABS. The heated bed is heated to a specific temperature, which is required for the chosen filament. A well-calibrated and heated bed is essential for successful printing. Without adequate bed adhesion, your prints will likely detach from the bed during printing. The heated bed temperature is extremely important. Ensure you use the correct temperatures for your filament type. Leveling the bed accurately is also a key step in achieving successful prints.
The Control Board and Electronics

The control board is the brain of the 3D printer, managing all the operations and communication between the various components. It interprets the G-code, which are instructions for the printer, and controls the motors, heaters, and other peripherals. The electronics include the power supply, stepper motor drivers, and endstop switches. Ensure that all electrical connections are secure and properly connected. A well-functioning control board is key for accuracy. Understanding the electrical components is important for proper maintenance. The control board and electronics are the heart of the printer, directing all activities. A properly functioning control board and well-arranged electronics will prevent many potential problems.
Assembling Your Tevo Tarantula i3 3D Printer
Assembling your Tevo Tarantula i3 3D printer can seem daunting at first, but the process is straightforward when approached methodically. Take your time, follow the instructions carefully, and don’t hesitate to consult online resources or the manufacturer’s documentation if you encounter any difficulties. A correct assembly is crucial for proper printer function. Ensuring all components are correctly installed is a must for successful 3D printing. Properly assembling your printer is the first step toward a successful 3D printing experience. You’ll find assembly is a rewarding experience.
Unboxing and Inventory Check
Carefully unpack all the components and lay them out on a clean surface. Make a detailed inventory of all the parts and components, comparing them to the parts list provided in the user manual. This helps you identify any missing parts or potential issues before you begin the assembly process. Ensure you have all the required tools and equipment, such as Allen wrenches, screwdrivers, and any other tools specified in the manual. This step is crucial to avoid delays during the assembly process. Document any missing or damaged parts immediately and contact the seller or manufacturer for replacements.
Step-by-Step Assembly Guide

Follow the assembly instructions provided in the user manual, paying close attention to the diagrams and illustrations. Begin by assembling the frame, ensuring that all screws are tightened securely. Install the X, Y, and Z-axis components, ensuring smooth movement and alignment. Attach the hotend and extruder, making sure the wiring is routed correctly. Connect the heated bed and any other peripherals, such as the LCD screen. This process is usually described in detail by the manufacturer. Review the manual and follow all the steps carefully, referring to online resources for guidance if needed. Patience and attention to detail are key to this step. Take breaks as needed, and double-check all connections before moving on.
Connecting the Electronics
Once the mechanical components are assembled, it is time to connect the electronics. Refer to the wiring diagrams in the user manual. Connect the stepper motor cables to the control board, ensuring that they are plugged into the correct ports. Connect the hotend and heated bed thermistors and heating elements to the appropriate terminals. Connect the endstop switches to the control board, ensuring they are correctly oriented. Carefully connect the power supply to the control board, paying attention to the voltage settings. Double-check all wiring connections to prevent short circuits or other electrical problems. Use zip ties or cable management systems to keep the wiring neat and organized.
Leveling the Print Bed for Optimal Results
Leveling the print bed is critical for achieving good first-layer adhesion and successful prints. An uneven bed can lead to warping, poor layer adhesion, and print failures. Bed leveling ensures the nozzle is at the correct distance from the bed across the entire print surface. This is a crucial step, especially with a printer like the Tevo Tarantula i3, which typically uses manual bed leveling. Proper bed leveling will make all the difference in the quality of your prints.
Bed Leveling Techniques

Manual Bed Leveling This involves adjusting the bed height at multiple points using the leveling screws. The process typically involves using a piece of paper between the nozzle and the bed and adjusting the screws until the paper can be moved with slight resistance. Use the Z-offset feature in your printer’s firmware to fine-tune the nozzle height relative to the bed. Automatic Bed Leveling Some Tevo Tarantula i3 models can be upgraded with an auto-leveling sensor. This sensor automatically measures the bed’s surface and adjusts the nozzle height accordingly. Regardless of the method, leveling the bed is a crucial step. Always double-check your leveling before each print.
Adjusting Z-Offset
The Z-offset is the distance between the nozzle and the print bed when the Z-axis is at zero. It is essential for achieving the proper first-layer adhesion. If the Z-offset is too high, the filament will not stick to the bed. If it’s too low, the nozzle will scrape the bed and potentially damage it. Adjust the Z-offset during the bed-leveling process or during the first layer of a print. Fine-tune the Z-offset until the filament is slightly squished against the bed. The goal is to achieve a good first layer. Consult the printer’s manual or online guides for information.
Loading Filament and Preparing for Printing
Once your printer is assembled, leveled, and calibrated, you’re ready to load the filament and begin printing. Choosing the right filament and preparing it correctly is essential for successful prints. Loading the filament ensures it moves smoothly through the hotend and extruder. This is one of the most fundamental steps.
Choosing the Right Filament

PLA (Polylactic Acid) PLA is a popular choice for beginners due to its ease of printing, low warping, and minimal odor. It is derived from renewable resources like cornstarch. ABS (Acrylonitrile Butadiene Styrene) ABS is a durable material that is suitable for functional parts. It requires higher printing temperatures and can be prone to warping. PETG (Polyethylene Terephthalate Glycol) PETG offers a good balance of strength, flexibility, and ease of printing. It is a good option for various applications. Consider the properties of each filament and their respective printing requirements. Refer to online guides for temperature and settings. Different filaments require different settings.
Filament Loading Procedure
Heat the hotend to the recommended temperature for your chosen filament. Insert the filament into the extruder, ensuring that it feeds smoothly through the extruder gears. Gently push the filament through the hotend until it begins to extrude from the nozzle. Purge the hotend by extruding a small amount of filament. This helps remove any air bubbles and ensures a consistent flow. Check for smooth, consistent extrusion. If the filament isn’t extruding, check for clogs in the nozzle. Load the filament correctly. Make sure the hotend is heated up before inserting the filament. This will prevent jams.
First Print and Troubleshooting
After assembling, leveling, and loading the filament, it is time to print your first model. Start with a simple test print, such as the calibration cube or a model provided by the manufacturer. This allows you to evaluate the printer’s performance and identify any potential issues. Printing a test model lets you verify your settings. You will need to understand how to troubleshoot common issues to get good prints. Following these steps will greatly increase the likelihood of a successful first print.
Downloading and Installing Slicing Software

Slicing software converts a 3D model into G-code, which is the instructions that the 3D printer uses to create the model. Popular options include Cura, PrusaSlicer, and Simplify3D. Download and install the slicing software on your computer. Choose the appropriate printer profile for your Tevo Tarantula i3. Import your 3D model into the software. Learn how to use your slicer. Configuring your settings is very important.
Preparing Your First 3D Model
Download a 3D model from a website such as Thingiverse or MyMiniFactory, or create your own using 3D modeling software. Import the model into your slicing software. Orient the model on the print bed. Adjust the scale and size of the model as needed. Check the model for any errors or defects before slicing. Prepare your model by making any necessary adjustments to ensure it prints correctly. Ensure the model is within the printer’s build volume. Save the model as an STL or OBJ file, which your slicer will use.
Initial Print Settings and Calibration
Configure the print settings in your slicing software. Set the layer height, print speed, infill density, and support structures (if needed). Set the nozzle and bed temperatures according to the filament type. Generate the G-code for your model and save it to an SD card. Insert the SD card into your 3D printer and select the G-code file to start the print. Watch the first layer closely to ensure that the filament is adhering to the bed. Monitor the print progress and make any necessary adjustments to the settings. Fine-tuning these settings will ensure a successful print.
Common Issues and Solutions

Nozzle Clogging If the nozzle becomes clogged, try heating the hotend and using a needle or a cleaning tool to remove the blockage. Poor Bed Adhesion Ensure that the bed is properly leveled and that the first layer is being extruded correctly. Warping Reduce the bed temperature, use a brim or raft, or enclose the printer. Stringing Reduce the printing temperature, increase retraction settings, or slow down the print speed. Layer Shifting Check the belt tension and stepper motor connections. Over-extrusion or Under-extrusion Calibrate the extruder steps and adjust the flow rate in your slicer. Always consult online resources for solutions. Troubleshooting can take some time, but can be overcome.
Maintaining Your Tevo Tarantula i3 3D Printer
Regular maintenance is crucial for keeping your Tevo Tarantula i3 3D printer running smoothly and producing high-quality prints. This includes cleaning, lubrication, and periodic checks of the various components. Proper maintenance will extend the life of your printer. Performing the right maintenance will greatly impact the quality of your prints.
Routine Maintenance Tasks
Clean the Nozzle Use a wire brush or a needle to clean the nozzle. Remove any filament residue. Lubricate Moving Parts Apply lubricant to the threaded rods, linear bearings, and other moving parts. Check Belt Tension Ensure the belts are properly tensioned. Inspect and Tighten Screws Check the screws for looseness and tighten them as needed. Regular cleaning and lubrication are essential. Check the printer periodically for loose screws. Regular maintenance will prevent breakdowns and prolong your printer’s life.
Upgrading Your Tevo Tarantula i3 3D Printer
One of the advantages of the Tevo Tarantula i3 is its upgradability. The open-source design and active community provide numerous opportunities for improving performance, reliability, and functionality. Upgrading your printer will greatly impact its quality and capabilities. Make sure to upgrade your printer in a logical order to avoid problems. These upgrades can enhance your 3D printing experience.