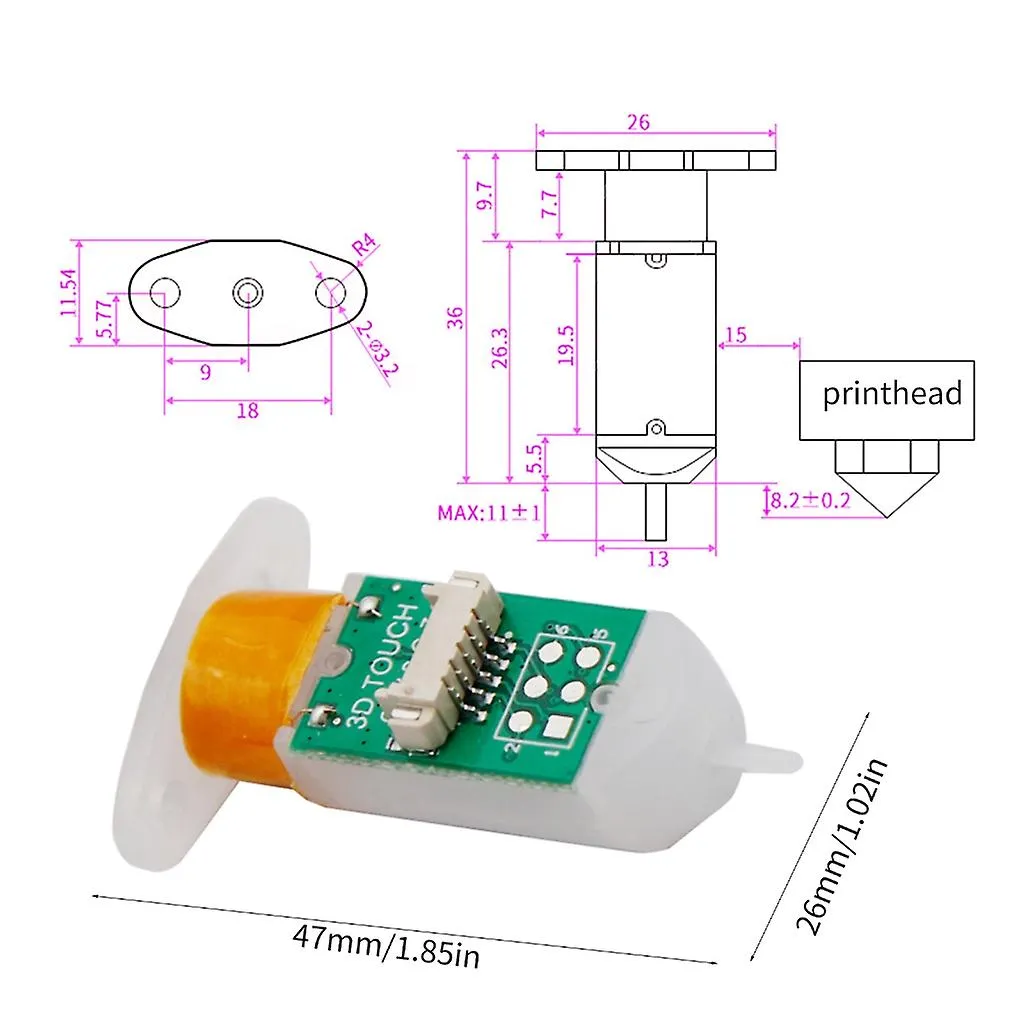
What is a Tevo Tarantula Bed Leveling Sensor?
The Tevo Tarantula is a popular and affordable 3D printer, known for its ease of use and modifiability. A bed leveling sensor is a crucial upgrade for the Tevo Tarantula, designed to automate the process of ensuring the print bed is perfectly level relative to the nozzle. This automation dramatically improves print quality, reduces the chance of failed prints due to poor bed adhesion, and simplifies the printing process, making it more accessible for beginners and more efficient for experienced users. By accurately measuring the distance between the nozzle and the bed at multiple points, the sensor allows the printer to compensate for any imperfections or variations in the bed’s surface.
Benefits of Using a Bed Leveling Sensor
Installing a bed leveling sensor offers numerous advantages for your Tevo Tarantula. First and foremost, it significantly enhances print quality. A level bed ensures the first layer adheres correctly, preventing warping, and improving the overall dimensional accuracy of your prints. Second, it drastically reduces print failures. One of the most common reasons for print failures is poor bed adhesion, which a sensor helps eliminate by ensuring consistent nozzle-to-bed distance. Third, it streamlines the printing process. Bed leveling sensors automate what can be a tedious manual process, saving time and effort. Lastly, it can accommodate for imperfect beds. Even with manual leveling, it’s difficult to compensate for subtle bed imperfections or warping, something a sensor can handle with ease.
Types of Bed Leveling Sensors Compatible with Tevo Tarantula

Several types of bed leveling sensors can be used with the Tevo Tarantula. The most common include inductive sensors, capacitive sensors, and mechanical (microswitch) sensors. Inductive sensors detect the presence of a metal surface, making them suitable for metal print beds. Capacitive sensors work on non-metallic surfaces, such as glass or PEI beds. Mechanical sensors, like the BLTouch, physically touch the bed to measure the distance. Each type has its advantages and disadvantages in terms of accuracy, reliability, and ease of installation. When choosing a sensor, consider your print bed material and the level of precision you require. Ensure that the sensor is compatible with your printer’s mainboard and firmware.
Choosing the Right Sensor
Selecting the right bed leveling sensor for your Tevo Tarantula involves considering several factors. First, determine your print bed material, as this dictates which sensor type will work. Second, evaluate the sensor’s accuracy and repeatability. High accuracy minimizes the chances of printing issues. Third, consider the sensor’s ease of installation and compatibility with your printer’s electronics. Some sensors require more extensive wiring and firmware configuration than others. Finally, factor in the cost and availability of the sensor, alongside any potential support or community resources that might be available. Researching different sensor models and reading reviews can help you make an informed decision. BLTouch is a popular choice for its reliability and ease of setup.
Installation Process
The installation process involves several steps, starting with gathering all necessary tools and materials. Begin by disassembling your printer’s hotend assembly to access the mounting points for the sensor. Carefully mount the sensor to a suitable location on the hotend carriage, ensuring it is positioned so the sensor’s probe or detection area is correctly aligned with the print bed. Then, connect the sensor’s wiring to your printer’s mainboard, usually following the instructions provided with the sensor. Finally, configure the firmware to recognize the sensor and define the Z-offset, which is the distance between the sensor’s trigger point and the nozzle.
Tools and Materials Needed

Gathering the right tools and materials is essential before starting the installation. You’ll need the bed leveling sensor itself, along with its mounting hardware, which often includes screws, brackets, and possibly some zip ties. You will likely also need a set of Allen wrenches or a screwdriver set, depending on the type of screws used. Wire strippers and crimpers may be required to prepare and connect the sensor’s wires. A multimeter can be helpful for verifying wiring connections. Also, a soldering iron can be beneficial if you need to extend or modify wires. Finally, a computer with the necessary software (like Arduino IDE or a similar firmware flashing tool) will be needed to configure the firmware.
Step-by-Step Installation Guide
The first step is to mount the sensor securely to your hotend carriage, making sure the sensor’s probe or detection zone is below the nozzle tip. Next, wire the sensor, connecting it to the appropriate pins on your printer’s mainboard. This typically involves connecting power, ground, and signal wires. Then, flash the firmware. After wiring, you’ll need to update your printer’s firmware. This process typically involves downloading the correct firmware file, modifying it to enable bed leveling features, and uploading it to your printer’s mainboard. Follow the instructions provided with your sensor and printer for your specific setup. Finally, configure the firmware settings, including the Z-offset. The Z-offset is the distance between the nozzle and the bed when the sensor triggers.
Wiring the Sensor
Wiring the bed leveling sensor is a critical step. The exact wiring configuration depends on your sensor type and printer’s mainboard. Typically, you will connect the sensor to the 5V or 3.3V power supply, the ground, and the signal pin on the mainboard. Inductive and capacitive sensors usually have three wires: power, ground, and signal. Mechanical sensors, like the BLTouch, may have more wires for power, ground, signal, and servo control. Consult the sensor’s documentation and your printer’s mainboard pinout diagram to identify the correct pins. Ensure the wiring is secure and correctly connected to prevent short circuits or other electrical issues. Use appropriate connectors or solder the wires for a reliable connection.
Connecting to the Mainboard

After wiring, the sensor must be connected to your printer’s mainboard. The connection points on the mainboard can vary. Some mainboards have dedicated pins for bed leveling sensors, while others require you to use an auxiliary port. For example, the signal wire often connects to a Z-endstop pin. Refer to your printer’s mainboard documentation to determine the correct pins. Ensure that the wiring is neat and organized, and consider using cable management to prevent the wires from getting tangled or interfering with the printer’s movements. Incorrect connections can prevent the sensor from functioning properly or, in some cases, damage the mainboard or sensor. Always double-check your wiring before powering on the printer.
Firmware Configuration
Configuring the firmware is essential to enable bed leveling functionality. First, you will need to install a suitable firmware version for your printer and mainboard, such as Marlin. Then, enable the bed leveling features in the firmware configuration file. This typically involves uncommenting lines related to bed leveling and sensor type. Next, define the sensor’s offset from the nozzle in the X and Y axes, and also enable the appropriate Z-offset adjustment. This will instruct the printer to use the sensor data during printing. Finally, compile and upload the modified firmware to your printer’s mainboard using the appropriate tools. Make sure to back up your original firmware before flashing the new one.
Flashing New Firmware
Flashing new firmware onto your Tevo Tarantula is a crucial step in enabling bed leveling. First, download the firmware (like Marlin) and the necessary software (like Arduino IDE) to compile and upload it. Then, open the firmware in the IDE and make the required modifications to activate the bed leveling features. Usually, you’ll need to uncomment specific lines to enable the sensor and choose the appropriate sensor type. After configuration, compile the firmware and upload it to your printer’s mainboard. The method for uploading varies based on your board but often involves connecting your printer to your computer via USB and using the Arduino IDE to upload the compiled firmware. Be cautious during this process and make sure you select the correct board and port in the software. Always back up the original firmware before flashing the new one.
Configuring the Firmware for Bed Leveling

After flashing the firmware, further configuration is needed to fine-tune the bed leveling settings. You will need to configure several key parameters. First, set the sensor type in the firmware (e.g., inductive, capacitive, or mechanical). Next, define the sensor’s X and Y offset, which specifies the distance between the sensor’s trigger point and the nozzle. Additionally, configure the Z-offset, which determines the vertical distance between the nozzle and the bed when the sensor triggers. This is often adjusted during calibration. Lastly, enable the bed leveling feature and choose your preferred leveling method, such as bilinear or mesh bed leveling, depending on your printer’s capabilities. Save the changes and upload the firmware to the printer, if required.
Testing and Calibration
Testing and calibration are crucial to ensure the sensor is working correctly. Begin by running a test to verify that the sensor triggers when it detects the bed. You should also check that the nozzle moves the correct distance. If everything functions as expected, proceed to calibrate the bed leveling. Calibration will optimize the print bed’s distance to the nozzle for perfect first layers. These steps ensure that your printer is ready to make the most of the new sensor. This involves adjusting the Z-offset and fine-tuning the settings until the first layer adheres perfectly to the bed. Without proper calibration, the sensor’s benefits will not be realized.
Initial Sensor Testing
After installation and firmware configuration, it’s essential to test the sensor to ensure it’s functioning correctly. First, manually move the nozzle toward the bed and observe the sensor’s behavior. Check if the sensor triggers when it detects the bed. You can usually monitor the sensor’s status through the printer’s control panel. Next, verify the Z-axis movement. You can manually adjust the Z-offset and test the printer’s response. If the sensor does not trigger or the Z-axis moves erratically, there may be wiring issues, incorrect firmware configuration, or hardware problems. Troubleshoot any detected issues before proceeding. It is recommended to perform a test print after verifying the sensor functionality.
Bed Leveling Calibration

Calibrating the bed leveling system is key to successful printing. The primary goal of calibration is to determine the Z-offset, which is the distance between the nozzle and the bed when the sensor triggers. The Z-offset must be adjusted to ensure the first layer adheres correctly without being too far or too close to the bed. You can typically adjust the Z-offset through your printer’s control panel while the printer is leveling the bed. Start with a small Z-offset value and gradually adjust it until the first layer adheres properly. You may need to repeat this process several times until the correct settings are determined. Use a level test print (a single-layer square) to fine-tune the settings. This guarantees that the nozzle height is precise.
Troubleshooting Common Issues
Even with careful installation, you may encounter issues. Sensor problems often arise. Common problems include the sensor not triggering, the bed being too high or low, and calibration issues. If the sensor doesn’t trigger, check the wiring connections, firmware settings, and sensor functionality. If the bed is too high or low, adjust the Z-offset and re-level the bed. Calibration problems may require you to fine-tune the Z-offset and adjust the bed leveling settings. If you continue to experience issues, consult the sensor’s documentation, online forums, or the printer’s community for assistance. Troubleshooting is part of the 3D printing journey, and patience is key.
Sensor Not Triggering
If the sensor isn’t triggering, first, check the wiring for loose connections or incorrect pin assignments. Then, verify the sensor’s power supply. A multimeter can confirm that the sensor receives the correct voltage. Ensure the sensor is the correct type for the print bed material. You can also manually trigger the sensor to ensure it is operational. If the sensor is still not working, inspect the firmware configuration to see if bed leveling is enabled and that the correct sensor type is selected. Sometimes, the sensor may be faulty and need replacement.
Bed Too High or Low

If the bed is too high or too low, the Z-offset might be incorrect. Access your printer’s control panel and adjust the Z-offset to fine-tune the nozzle-to-bed distance. If the bed is too high, the nozzle will be too close to the bed. If the bed is too low, the first layer may not adhere. Use a leveling test print to determine the correct Z-offset. Make small adjustments and monitor the first layer’s adhesion. If the issue persists, review the firmware settings to ensure the Z-offset is set correctly.
Calibration Problems
Calibration issues can result in poor first-layer adhesion or uneven printing. If you experience calibration problems, start by ensuring the bed is clean and level. Next, run a bed leveling sequence and carefully observe how the sensor interacts with the bed. Also, verify the sensor’s X and Y offsets. Adjust the Z-offset to correct the distance between the nozzle and the bed, and then run test prints to evaluate the results. If these steps don’t resolve the problem, check the firmware configuration for any potential issues. Refer to online forums or seek assistance from the printer’s community. The iterative approach is key to solving calibration issues.
Fine-tuning and Optimization
After installing and calibrating the bed leveling sensor, you can fine-tune the printer for optimal performance. Start by optimizing the Z-offset to ensure perfect first-layer adhesion. You can also adjust other settings to improve print quality, such as the bed temperature, nozzle temperature, and printing speed. Explore different bed leveling methods like mesh bed leveling or bilinear leveling. Make small adjustments and monitor the results. Finally, keep the bed clean and free from debris. Periodic maintenance and adjustments will maintain the sensor’s effectiveness.
Adjusting Z-Offset

The Z-offset is crucial for print quality. To adjust the Z-offset, first, run a bed leveling routine or preheat your printer to the appropriate bed temperature. Then, start a test print, like a single-layer square. Watch the first layer as it prints. If the nozzle is too far from the bed, the plastic won’t stick. If the nozzle is too close, it might scratch the bed and cause the plastic to bunch up. While the print is running, use your printer’s control panel to make small Z-offset adjustments. After each adjustment, observe the first layer’s adhesion. Continue making adjustments until the first layer looks smooth and adheres properly. This process may require several iterations.
Improving First Layer Adhesion
Improving first-layer adhesion is key to successful 3D prints. Ensure the bed is clean and properly leveled. Calibrate the Z-offset so that the nozzle is at the correct height above the bed. Then, use a suitable bed surface, like glass, PEI, or blue painter’s tape. Adjust the bed and nozzle temperatures. Some filaments require specific temperatures for good adhesion. Reduce printing speed for the first layer, as this gives the plastic more time to adhere to the bed. Finally, use a brim or raft to increase the surface area. These techniques provide extra support to the print.